

are my bread and butter.
For all of my professional life I've written for a living.
I want to

you too.
I know I've been absent from my blog lately
since I find Instagram a bit faster and easier these days.
But its not about

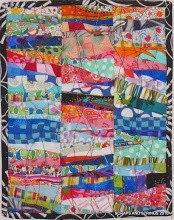
A couple of weeks ago I explained the basics of letter making to a local guild.
Since I made the samples and got the pictures,
I'm sharing it here as well.
To give credit: I was inspired and instructed in letter making by
Tonya Ricucci and her 2010 book Word Play Quilts.
It's out of print, but you can buy the the ebook here.

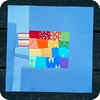
The letters are easy to make once you think of them as wonky log cabins.
Here I've built the beginning of a log cabin and formed the letter L.

You can see the scale of the strips and letters from the background cutting mat.
I make my letters relatively small.
These finish at 3 to 3.5 inches.

If you continue all around, you've got yourself an O

If you like a more rounded look,
sew off the corners like a snowball block

and do it again with the background fabric.
This is the basic building block for lots of lower case letters
like c and u and d and b and p and h and q and g

some letters have more angles,
and its easier to slash a square of background material
and insert the letter strips.

This keeps the edges on the straight of grain and easier to work with
when you join them with other letters.

That little bit on the bottom of the V gets caught in the seam allowance

Here's an upper case E

And this is what you get when you put it all together.
Sharp eyed readers may notice this is a different V than above.
I made two letter sets and experimented with layout.
I also tweeked the E to get it to the right size.

Once you're happy with the shape and size, sew them together
and add narrow strips or spacers between where necessary
to make sure letters don't run into each other.
Here are both versions with strips sewn around them.
You can see the bottom V turned out just fine.

I know there's lots of ways to make letters,
but the advantage of this one is there's no set size or pattern
and you don't have to tear paper off the back once you're done.
I've written a previous tutorial on how to make letters from strip sets.
You can find that here.


.jpg)


.jpg)


.JPG)


.jpg)


1 comment:
I like making letters. Sometimes when I make quilts for kids I like to piece their name and use it on the back or sometimes on the front. I have used Tonya's method too!
Post a Comment